Furniture Projects, Craft Projects, Thrift Store projects

Saturday, January 21, 2017

Grey Paisley Dresser and side table


Grey Paisley Dresser and Side table
Actually finished November 2015


I had been waiting a long time to find the right piece to try this fabric detail and I am so happy with the outcome that I am definitely doing this again!


The furniture has wonderful detail but the wood tones are faded and sad. There is a fake veneer so there is no stripping or staining that I can be done on them.


I just love this paisley burlap!


The body gets a couple coats of French Linen and the drawers get a lighter version of French linen that I made with Old White. 

 In the end you will see by using two tones of this color it will give it nice dimension.


Adding the fabric was pretty easy. I cut it to fit and then spread a layer of Mod Podge on the drawer where the fabric is to go. Once that is done lay the fabric down and smooth out any air bubbles. Then apply another liberal dose of Mod Podge to the top of the fabric and let dry. I do this with the drawers out of the dresser facing up so there are no drips.


 I am so in love with this!!!
What do you think?

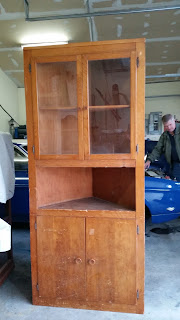
Corner Hutch


Corner HutchWith ceiling tin wallpaper
Actual finish date was February of 2015


It can be a lot of hard work to take something so basic and plain and make it come to life again, but seeing the before and after reminds me why the hard work is worth it!


One of my favorite colors is Annie Sloans French Linen, it compliments all other color choices. The blue green color is a color I had specially mixed so I cannot tell you the color. I have used this textured wallpaper on quite a few projects now.  Here are a few links that will show how to apply wallpaper to furniture.  http://shabby2uniquelychic.blogspot.com/2014/04/dumpster-to-rustic-diva-dresser.html


Before paint


Here a some of the products I use to antique the wallpaper. It can be a long process of painting and dabbing to get it to look just the way you want it to.


Coat one of glaze. The camera flash makes it look darker than it really appears in person.


Fun stencil to give plain doors more detail


Saturday, October 3, 2015

French Country Armoire


I absolutely love this piece! It was a big one to deal with, getting it loaded on the truck, getting it in the garage by myself, and a lot of square footage to paint, but the end the results were so worth it!
Come and see the transformation for yourself!


 I am sure it was pretty in it's day, but has since lost its glory.


First I start with a layer of French Linen from Annie Sloan chalk paint


Then I pick what detail I want to accentuate and mix a lighter grey using french linen and old white. 


I do the same to the body of the armoire and then pick a few more spots to accentuate with light grey and bits of white.


I then sand the edges here and there to give bring out the detail and little bits of wood color.


This baby was hard to wax, but somehow I managed! Maybe a few hand cramps or two. 
But here she is the finished piece, isn't she gorgeous!


I had to add a back and a removable shelf, both were missing from this piece. Now it can be used to store clothes, crafts, or even a tv. I think this piece would be amazing as a craft closet.


This piece had so much built in detail and texture it really wasn't hard to give it the old world charm it deserved. It's size was the only real hard thing to deal with, but it was worth it, don't you think?

Banged up to Beautiful


You can also see what I am up to at https://www.facebook.com/Shabby2UniquelyChic


I haven't done a blog post in a long time, and I haven't painted much furniture this year. It was a year full of other priorities, but now I am happy to be able to be back in the swing of things.

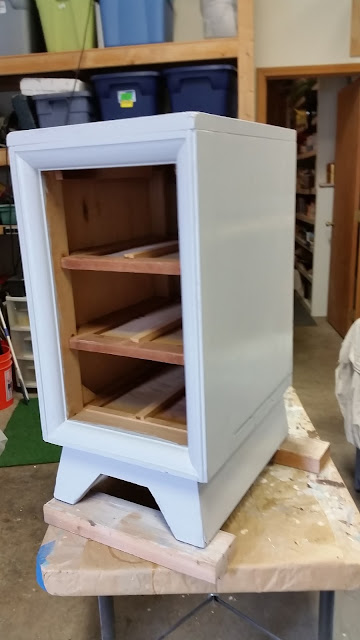
Here are a set of nightstands that were found on the side of the road by a friend. They had been clearly left out for a long time, they were brittle, chipping and in all around bad shape. In their previous life they had been a vanity and must have been separated at some point. They have grooves where they had been connected. 
My friend gave these to me, and I decided I was going to redo these for my daughter's college dorm room instead of selling them. The drawers were in good shape, but the body of these nightstands were in bad shape.


There is a lot of missing veneer and rough spots, and if I were selling these I would have spent time filling in those with wood filler, but all I did was wipe them down to get the grime off, did a little sanding to knock off the chipping paint and then started painting.
I stripped down the drawers, because I am going to be staining them and giving them a unique look.


I mixed my own color of grey from Annie Sloan chalk paint. I used pure white and graphite.


To add more interest I painting the trim pure white. I stained the drawers and use a stencil I bought from Hobby Lobby. After the drawers dried I sanded slightly to soften the stenciled parts. 


Here is the part where they used to be joined. I was originally going to leave it as is since they were just going into a dorm room, but I just could leave it as is. Filling it with wood filler would have been time consuming and you still would see a huge imperfection.


So here is my solution! I had a some nice strips of scrap wood that I cut to the right length and just nailed them into place.


Paint and Ta Da, that imperfection is now hidden. If I had had some fun trim pieces I would have done that, but I am going economical on this piece.


Now look at these cuties! You would never guess how ugly and abused they had been before this. Someone's trash really can be someone else's treasure!
These are some knobs I bought a long time ago at Hobby Lobby, but I am pretty sure they still sell them. 
I think for about $25 I turned these freebies into something special.


Sweet Victory!