I bought this poor little dresser from an estate sale, and it had definitely seen better days. At some point someone had spray painted it black over the top of chipping white paint, so you could see every spot the old paint was and wasn't. Since this was going to be a more rustic piece I decided not to strip it down, but just sand down the high spots. Even if I were to strip it down the wood underneath was not going to be pretty. I thought this would be a fun piece to add my textured wallpaper that looks like ceiling tin.
SO HERE WE GO!
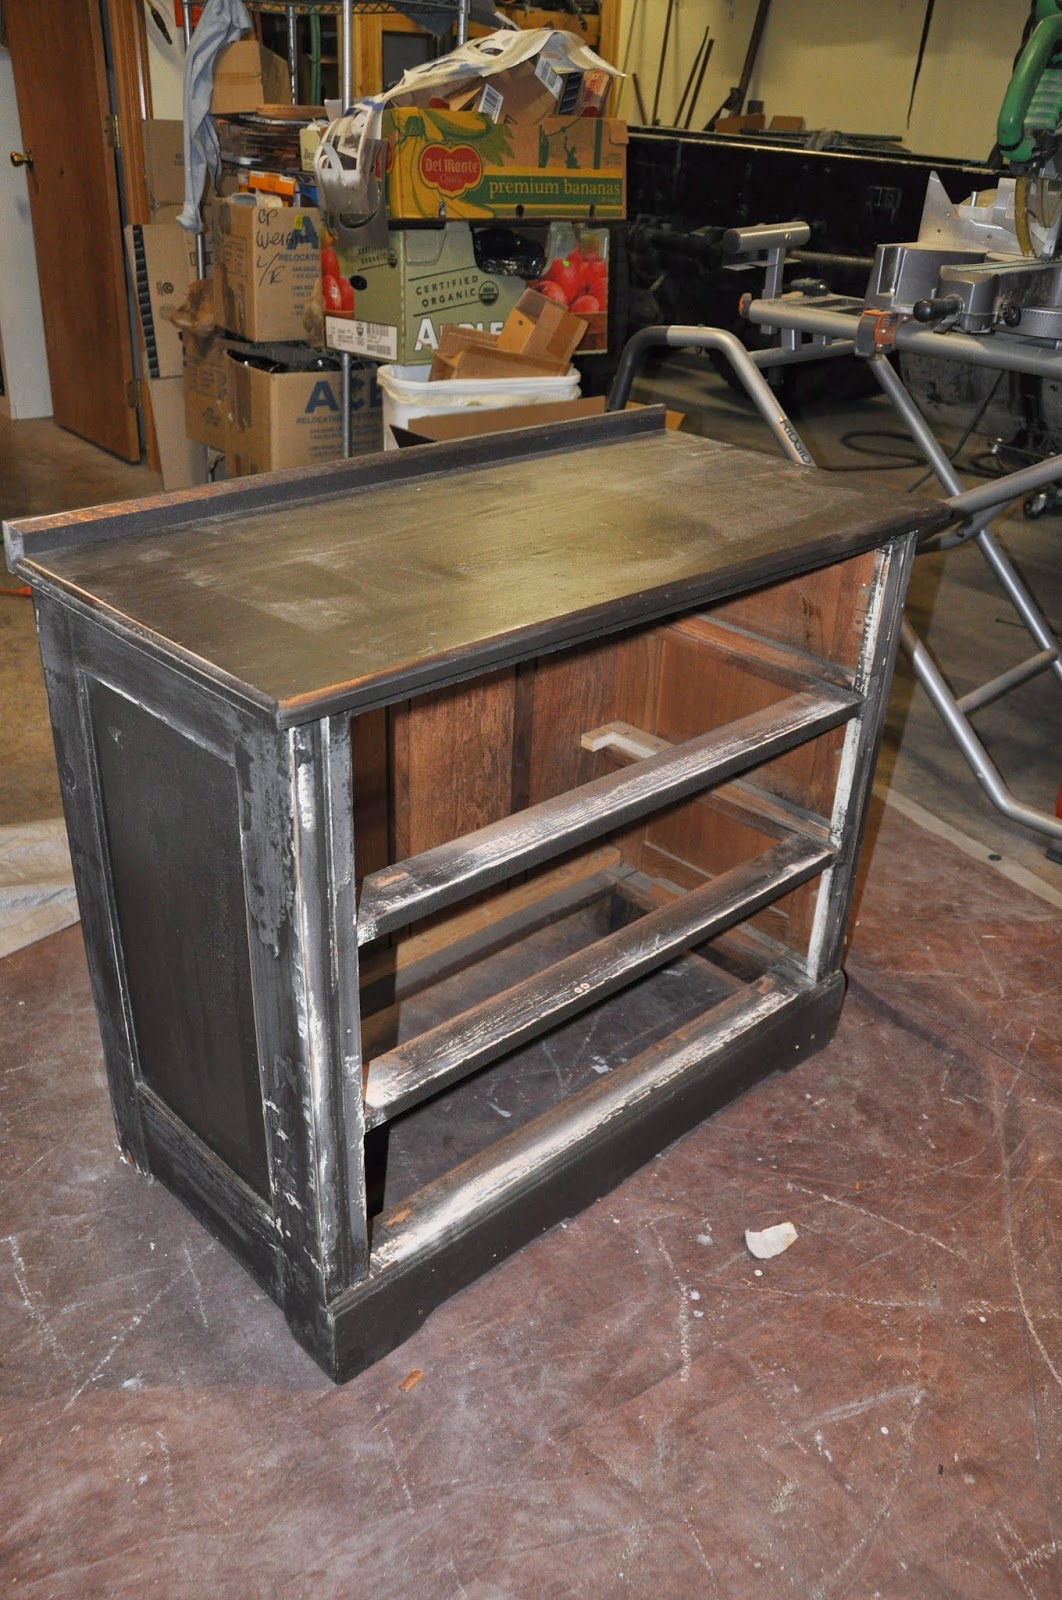
I started off by sanding down the high spots, but still wanted to leave some of the roughness since this dresser is going to be rustic. But from the pictures you can see how bad the second paint job was over the top of the old chipping white.
She is ready for her facelift!
First coat of Annie Sloan chalk paint Paris Grey
Alright here I am going to show you my step by step on how I put the textured wallpaper on the dresser and how I paint it to make it look aged.
First I measure carefully, knowing that both side of the dresser are not going to be completely the same. This paper already comes with paste on it so that is one step you do not have to worry about.
Then I run the paper into the water slowly allowing a good 30 seconds so that the paper gets wet
Next fold in half gently so that paste side is facing paste, and allow 3 min so that the paste becomes totally wet and this allows the paste to activate and get gummy.
Next just simply place the paper on the dresser and slowly and gently rub the air bubbles out. I haven't really had a problem with air bubbles with this paper, but you will get some seepage of the paste as you are working it into place and getting out air bubbles. Just clean up the excess paste with a slightly damp paper towel.
I put the paper on in the evening and I allowed the paper to totally dry over night and began painting it the next day.
Even though I sanded and cleaned up, de-greased this piece before I painted I had a spot were the paint was bubbling and chipping off. I scrapped off the chipping paint cleaned that area again, but it still did the same thing, and yes this is a point of frustration! A trick I have learned from others is to spray it with a spray shellac. It dries really fast and then just paint over it, it creates a barrier that allows the paint to stick. Zinsser is the brand I used.
Alright moving on to the aged painting technique I use. These are some of the products I use to help get the aged patina. For this dresser I used everything but the Metal and Patina glaze. This particular glaze is more golden and I needed it to be more sliver, but I wanted to show you options. The Zinsser blend and glaze I have had for years and years and years, so you will need to find a newer version of this, plus there are many brands out there that you can buy at your local hardware or paint shop.
First I put the Paris Grey down as a base and I used this color since it is the color of my dresser. I am going to be putting many layers of different concoctions on and each layer pops through a little giving it depth.
As I put on my first coat, while it is still wet I dab off some of the paint, this will help give it texture and depth.
Next I mix some antiquing glaze and glaze extender. The glaze extender gives me time to work with the antiquing glaze.
Don't get scared with this step, I know it looks gross and dark, but just remember there are more layers to come. This layer is very important to continuing giving the paper depth and contrast.
The next step I am adding in some of the Martha Stewart metallic glaze. I could easily leave it at this point if I wanted to (of course cleaning up the edges), but I want to add in some more layers for this piece. My drawers are white so I want to tie in some of that color onto the sides.
I used some Annie Sloan Old white and used a very dry brush and a light touch to apply it. I worked with it until I got the effect I wanted. I also dabbed in just a little more Paris grey here and there. For me the point is that no one color is really that dominant, they all work together to give the aged look. I take a practice piece of wallpaper and play around with it to see what I want to do.
Another great tip is using a hair dryer to dry the paint in between techniques so I can keep going and not have to literally watch paint dry.
Here is my little cutie after some clear wax. The top is actually the Paris grey trimmed out with old white.
The hardware was dark rod iron, and I felt I needed to soften it up so I did a dry brush of old white. The hardware was bought at Hobby Lobby.
Yep my little photo bomber Lacey
 I bought this dresser at an estate sale and paid more than I usually do. I could tell it was a quality antique, but the varnish had gone bad and create a weird ripply texture. I knew I wanted to strip down the top and restain it, and strip down the drawers and leave as much of that wonderful wood as I could. I love the 2 tones the drawers have, which are actually different woods, and the raised detail.
.JPG)


.JPG)

.JPG)
.JPG)