This is a nice large pine cabinet with big deep drawers. I haven't really measured it, but it is taller than me and I am 5'-1". It has 2 shelves that go in the cubby and would look so good with large baskets. I thought this would be a great cabinet for crafts or even toys in a family room.
Of course I have a vision for this cabinet and it is not staying like this for long.


Nice Pine drawers

First coat of white paint. This big beast got to have the spray gun treatment or my arm would fall off painting it.

Drawer before wallpaper treatment

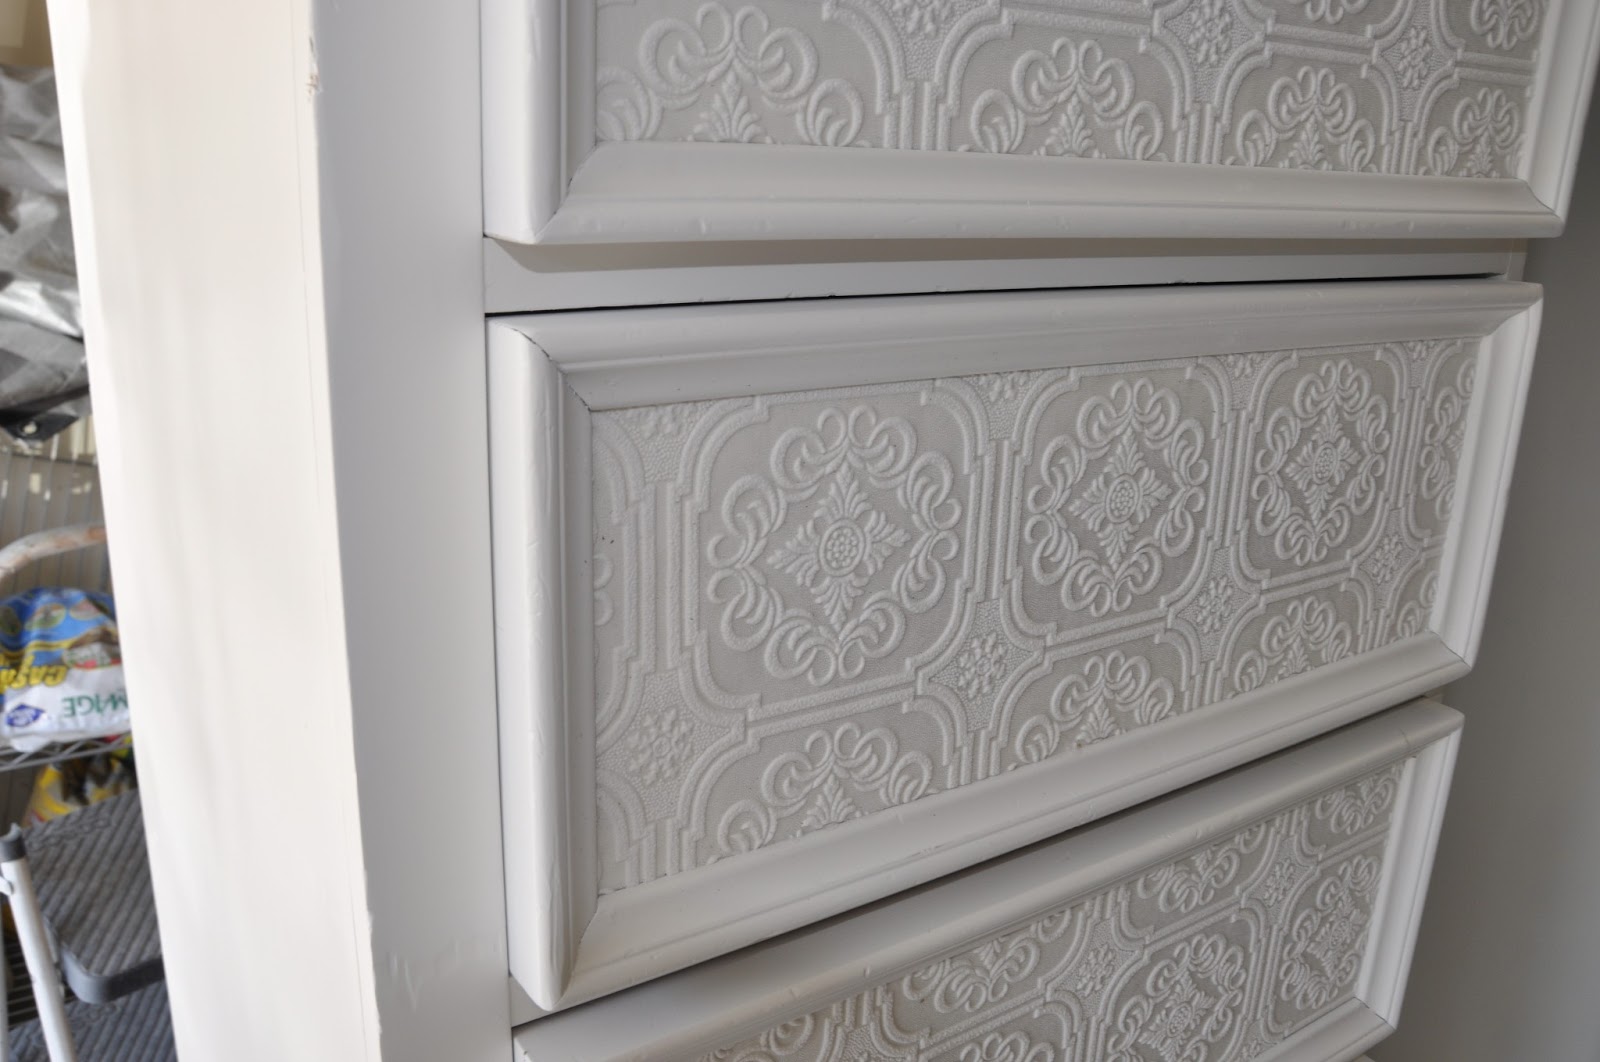
This is great wallpaper, it has a raised embossed paintable surface, so you get the tin ceiling look. Basically I cut each piece to fit first then followed the directions on the package. This is pre-pasted paper, so all I had to do was soak it for a few moments, fold the paper so paste is facing paste. Let sit for about 3 minutes so the paste gets fully sticky. Then you just lay the paper where you want it, and smooth out to get all air bubbles out. You have to be careful with this paper if you press or scrape to hard you can damage the paper. You may have a little seepage of the paste coming out the edges, but all you have to do is wipe it off while still wet.

After wallpaper, but it still needs to be painted and antiqued. You need to make sure your paper is all the way dried through before painting, I gave mine a whole day before painting.

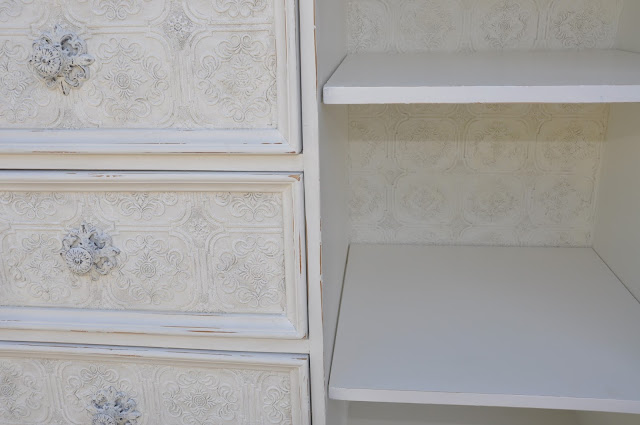
It is hard to see the wallpaper on the inside, but it will look nice when done.


It's Finally Done!
It took me awhile to figure out how to do an aging technique on the textured wallpaper that I liked, but once I did it felt so good to see the final product.
I used a glazing medium mixed with an antiquing glaze, brushed it on and dabbed it off with a cloth. I then added a darker white over the top with a dry paintbrush. My last layer was dabbing the Swiss coffee color on the top with a stenciling sponge. Feeling happy with the results!


This is definitely something I would love to do again on another piece but experiment with other colors.
I think this is so very pretty. It really looks like you spent a lot of time on it. I wonder how durable the paper will be in the long run. Do you think it will hold up to being bumped or scratched without ripping or peeling? Is there a protective layer on top? Just asking because you worked so hard on it and it is so pretty it would be a shame if something got shoved onto the shelf and ripped the paper. I wonder if you could come close to this effect with a textured stencil? Would it be durable too? Never did either one.
ReplyDeleteYes this was a time consuming project, but worth it in the end.
ReplyDeleteBecause I used latex paint I did not do any protective coat, but I think it would be worth looking into to see if it would make it more durable. If you are using on walls all it says is to paint it. I think this paper would not work on just any piece of furniture, like something that is used a lot. If it is and accent piece, or a piece that is not in the line of traffic. You would have to gouge it pretty bad for it to be noticeable. I think the paper is protected pretty well on this piece because the trim is thick and does help protect it. Also the paper would not be hard to take off if at some point someone wants to redo it again.
I have never done a textured stencil so I can't answer you on that one. I hope I was able to answer your questions.
That is AWESOME. I was just looking at the paintable wallpaper last night and was trying to figure out what I could use it on. Thank you for sharing your inspiration for this dresser. I just love it. You did a really nice job.
ReplyDeleteBest wishes
Thanks Debra, I bought my paper even before I knew I had something to use it for, because I thought it was so cool. I have only used it on 2 pieces so far and I am itching to do use it again. I just have to wait until the right piece of furniture comes along. Anything that mimic's ceiling tile I am in love with!
ReplyDeletewhere do you get the wallpaper and knobs? This piece looks like a million dollars--really
ReplyDeleteI got the paper at Lowes, in their wall paper section, they usually keep a few kinds stocked. It was only about $20 for the roll and one roll goes a really long way. The knob I bought at Hobby Lobby, they have a great selection of hardware. If you are not close to one you can order them from their website. In store their hardware is always 50% off online it is regular price, occasionally they have an online sale.
Deletewow I am in love with this! I posted a link to this on my blog...if that's ok with you :) http://sassytownhouseliving.com/
ReplyDeleteI can't wait to try this...wow!
Carol that is very flattering and I think it would be great if you wanted to post a link.
Deleteit came out beautiful!!!!! where did you find the furniture?
ReplyDeleteThis particular piece was given to me by a friend, but usually I get things off of craigeslist or estate sales.
DeleteThis comment has been removed by the author.
ReplyDeleteSince you first posted how has it held up? Any rips or tears? I am so wanting to try this on a couple of night stands that I was going to toss out because they look so dated, but I think this might just make them fab again.
ReplyDeleteIt has held up really well. A friend bought it and she uses it to hold the craft supplies for her and her kids, in a high traffic part of their house. I have done this on a few other pieces and they have held up well also. I am currently working on a new piece with a new textured paper and hopefully soon I will be posting the results.
DeleteWhat exactly did you out on it after the wallpaper!? Can you be very specific with steps! I want to try this but I have no clue what I am doing
ReplyDeleteI am going to give you to a link to another piece I did with this paper. The glazing technique is the same, but the colors were a little darker. All you have to do is add more of the clear glazing medium to lighten the color. brush on the glazes lightly then dab off until the color looks like what you want. I do many layers of glazes until I get what I want. If you have more questions I will try and answer them. It is always easier to show someone in person then to explain with words. At some point I will try and do a video.
Deletehttp://shabby2uniquelychic.blogspot.com/2014/04/dumpster-to-rustic-diva-dresser.html
I saw you said you used a spray gun for the paint. What kind of spray gun do you use?
ReplyDelete